
This post is also available in: Français Deutsch
Anycubic… My first FDM 3D printer was an Anycubic, the i3 Mega, and I haven’t had the opportunity to try any new FDM printer from this brand since, so this is a good opportunity for me to see how the Anycubic range has evolved since the i3 Mega!
The Anycubic Kobra is a 3D FDM printer with a 220x220x250mm printing area, for a budget of less than 300€ (289€ on the official website at the moment).
Equipped with a self-levelling sensor and partially assembled, this machine seems at first sight easy to use, and could satisfy a beginner in 3D printing.
Note that Anycubic has completely renewed its range of FDM 3D printers, the Kobra series also exists in a Plus version with a 300x300mm plate, and a Max version with a 400x400mm plate.

Main features of the Anycubic Kobra
- Pre-assembled machine
- Heated platen, with flexible magnetic surface (textured PEI)
- Self-levelling sensor
- Direct-drive extruder
- Colour touch screen
- X and Y axis belt tensioners
- 32-bit motherboard (Trigorilla Pro)
- Micro SD card reader
On paper we are looking at a machine similar to an Ender 3 S1 (without the dual motor on the Z axis), for a much more interesting budget, so let’s see what this Kobra has in store!
Unpacking and assembly of the Kobra
We find a well protected machine, partially assembled in 2 parts, a set of usual accessories and a reel stand. The materials seem to be of good quality, and the structure relatively robust.


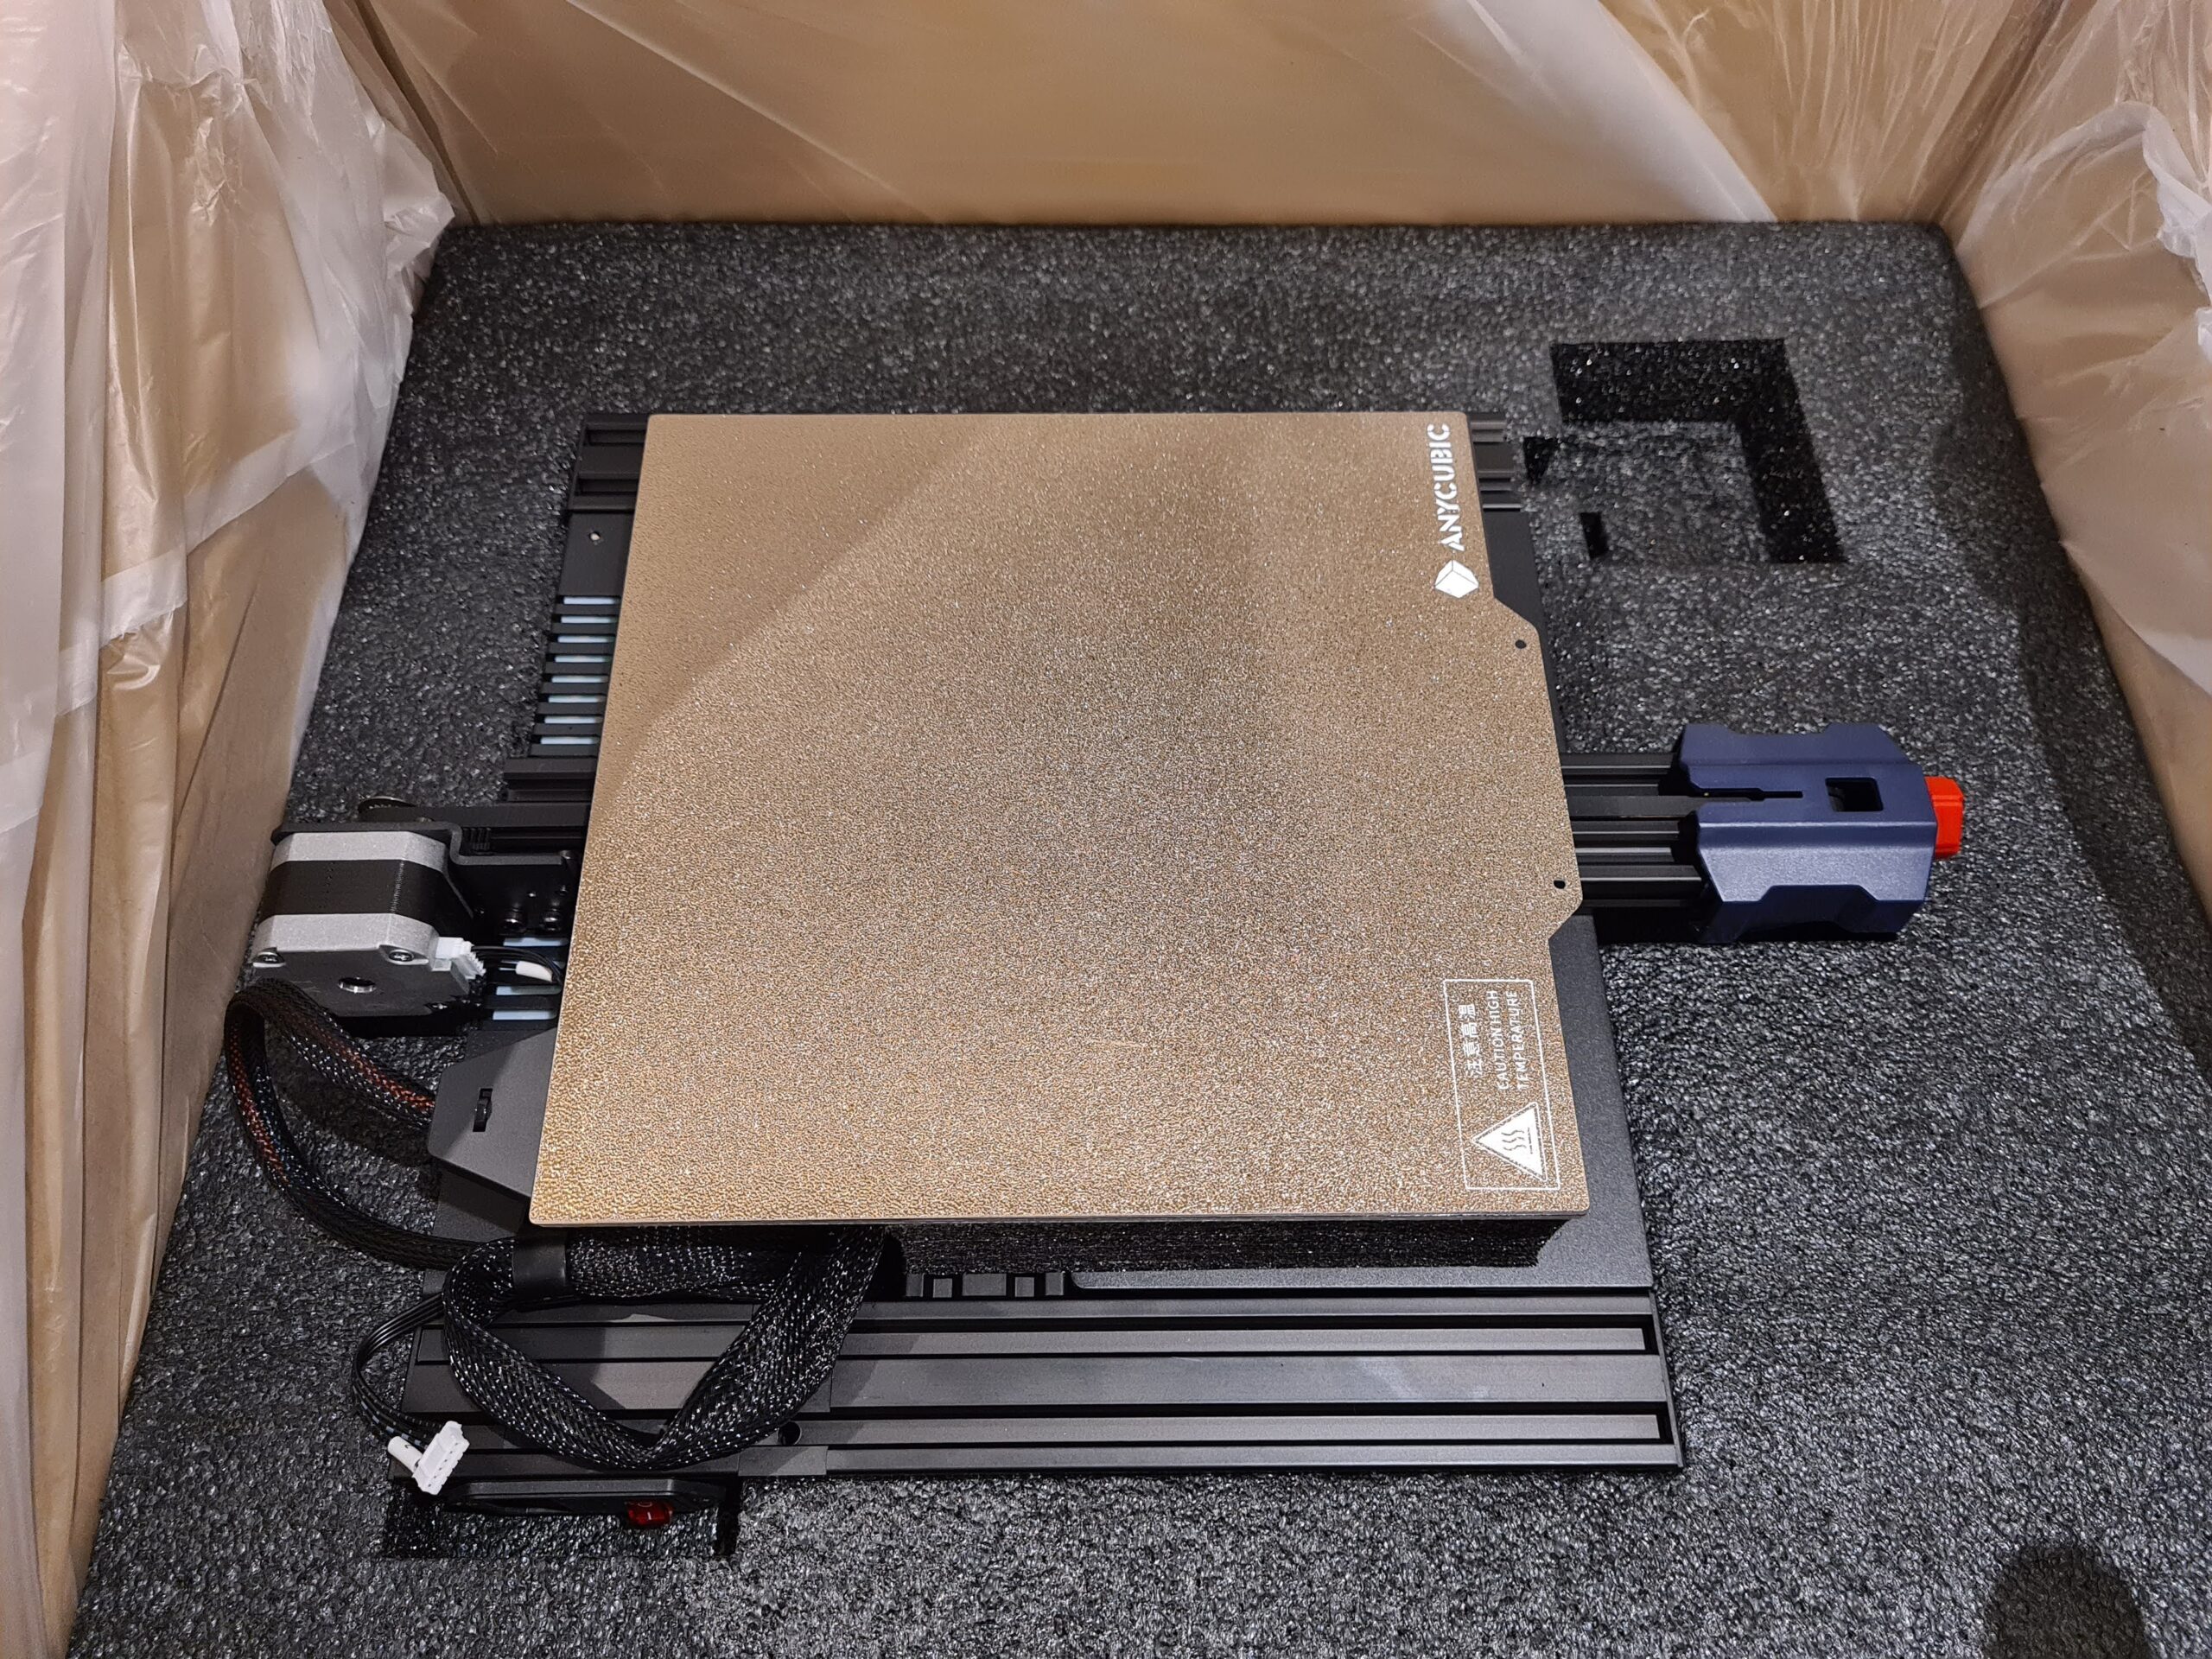


As for the assembly, nothing too complicated, as with most recent 3D printers, you will only need a few minutes to assemble the Anycubic Kobra, 4 screws to fix the 2 main parts together, a few cables to connect, the screen to fix and you will be ready to use your new toy!
Calibrating the board before the first print
The calibration process will take a few minutes, and will set the tray automatically, an adjustment of the Z-Offset will adjust the height of the nozzle and thus have a perfect first layer and a very good grip on the tray.


For the first print, it is strongly advised to print the test model provided on the micro-sd card
Here is my very first print with the Anycubic Kobra, what is quite funny is that it was already this model at the time of the i3 Mega, a little nostalgic thought… Otherwise the rendering of this first print is really clean, no defects, and I had a very good grip, the self-levelling sensor seems to have done its job well (we’ll see later with bigger prints, if it’s really the case!)

Prusa Slicer configuration for the Anycubic Kobra
Prusa Slicer, my favourite slicing software, does offer the Anycubic family in its configuration wizard, but unfortunately not the Kobra series, maybe an update is needed? A little bit in a hurry to launch my first print, I choose a machine profile relatively close to the configuration of this Kobra, i.e. a profile for Ender 3 S1 (direct drive with self-levelling, and identical print size).

First prints with the Anycubic Kobra
I set a layer height of 0.20mm for PLA, and keep all the default settings, and here is the result for this first print, with black filament from Eryone, the rendering is very clean, for a profile without any manual adjustment, I think I can use this profile for the rest of my test.

I take advantage of having this black filament installed to launch a second print, in reverse mode to be able to find the textured surface in the direction of the writing.
And the result is really satisfying! I appreciate this type of plate which will give a very nice finish to the layer underneath, with a little shiny effect..


We continue the test with a small calibration cube (very clean) and a small rocket in vase mode, the result is quite good, but it’s time for me to change filameng to give colours to these test prints!


To give colour, what better than a small rainbow filament from Eryone?
I wanted to print a cobra, but I couldn’t find one without support, and I hate removing the support… so this one will do the trick! The rendering is really nice, the articulated model seems to be very strong, with a nice shiny surface underneath, this is the only picture I had time to take, my son already took this print to play in his room…

Here are some other prints in a slideshow, in PLA, overall the result is really good, I haven’t had any print failures yet, after about 50 hours of printing.


Finally, I wanted to take advantage of this PEI surface to print some PETG for this test, so I used a PETG filament from Eryone, in white colour, with a printing temperature of 240° and the plate at 70°, I added a small layer of glue to improve the grip on the plate.
The result is also satisfactory, there are probably still a few settings to improve to avoid stringing, but for a first test in PETG it is really very good!


To conclude, my review on this Anycubic Kobra
This Kobra was really pleasant to use, as soon as I unpacked it I could see the very good finish of this 3D printer and I couldn’t wait to be able to launch my first prints.
Easy to assemble, silent, self-levelling, it meets all the criteria one might look for today to start 3D printing, or even for advanced use.
I have not yet been able to try printing TPU, but the test on PETG, which is a bit more complicated to print than PLA, shows that this machine can satisfy more advanced users.
Overall I am satisfied with this Kobra, and I will gladly recommend it to my friends and family.


